> ## Documentation Index
> Fetch the complete documentation index at: https://docs.postiz.com/llms.txt
> Use this file to discover all available pages before exploring further.
# X (Twitter)
> How to add X to your system
Watch the YouTube Tutorial: [https://m.youtube.com/watch?si=swqzAXiSTFOXZiFo\&v=3WneMPnOu88](https://m.youtube.com/watch?si=swqzAXiSTFOXZiFo\&v=3WneMPnOu88)
X is a bit different.
They created an oAuth2 flow, but it works only with Twitter v2 API.
But in order to upload pictures to X, you need to use the old Twitter v1 API.
So you are going to use the normal oAuth1 flow for that (that supports Twitter v2 also 🤷🏻).
Head over the [Twitter developers page](https://developer.twitter.com/en/portal/dashboard) and create a new app.
Click to sign-up for a new free account
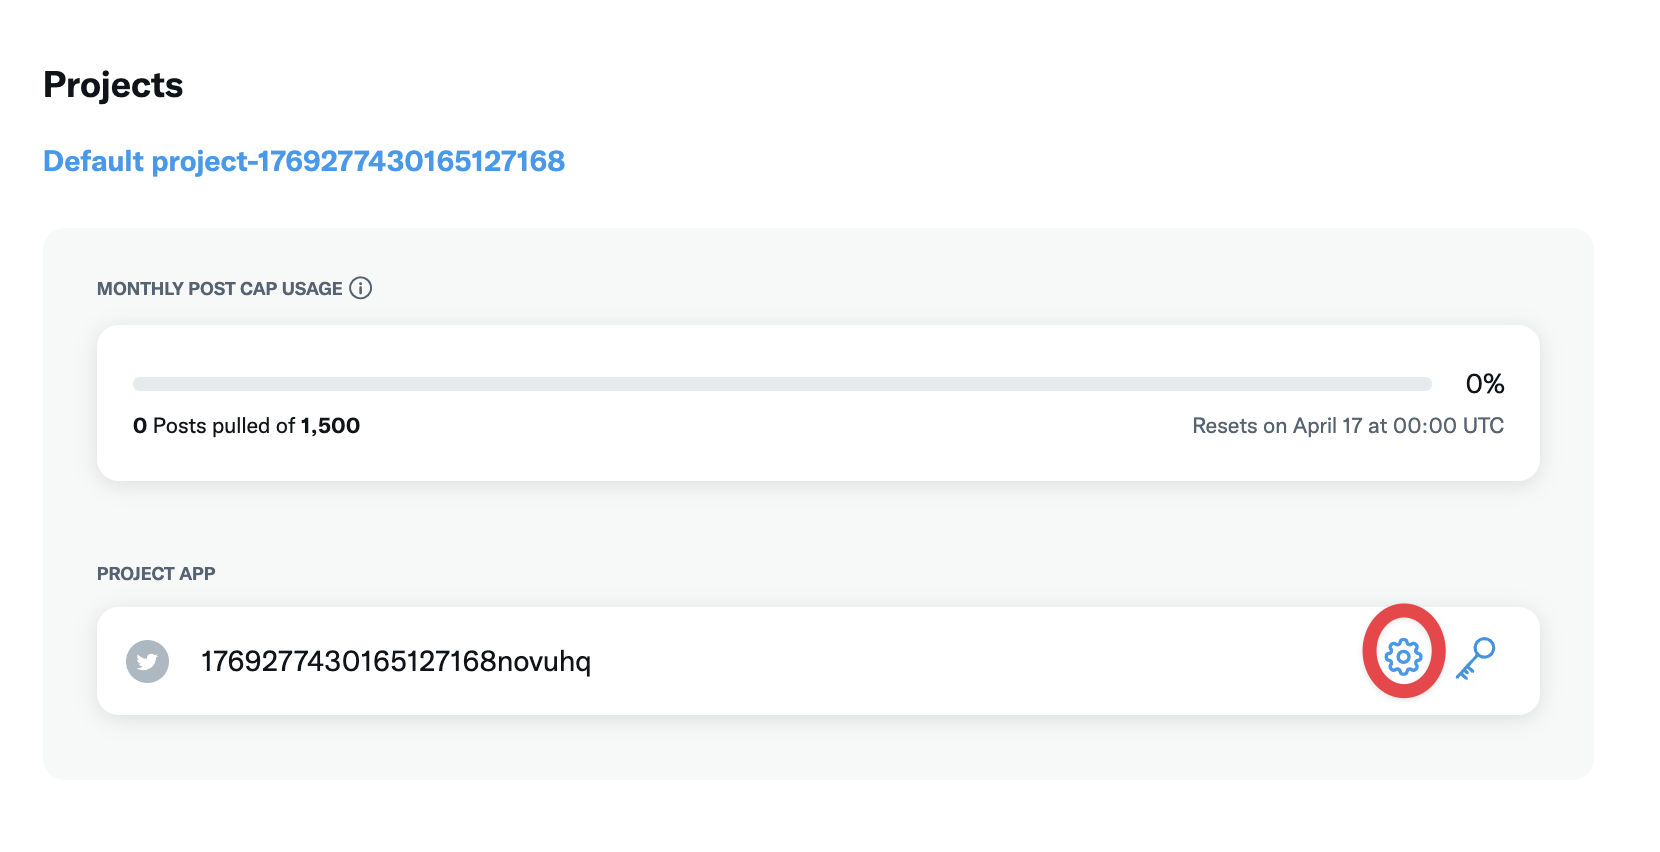
 Click to edit the application settings
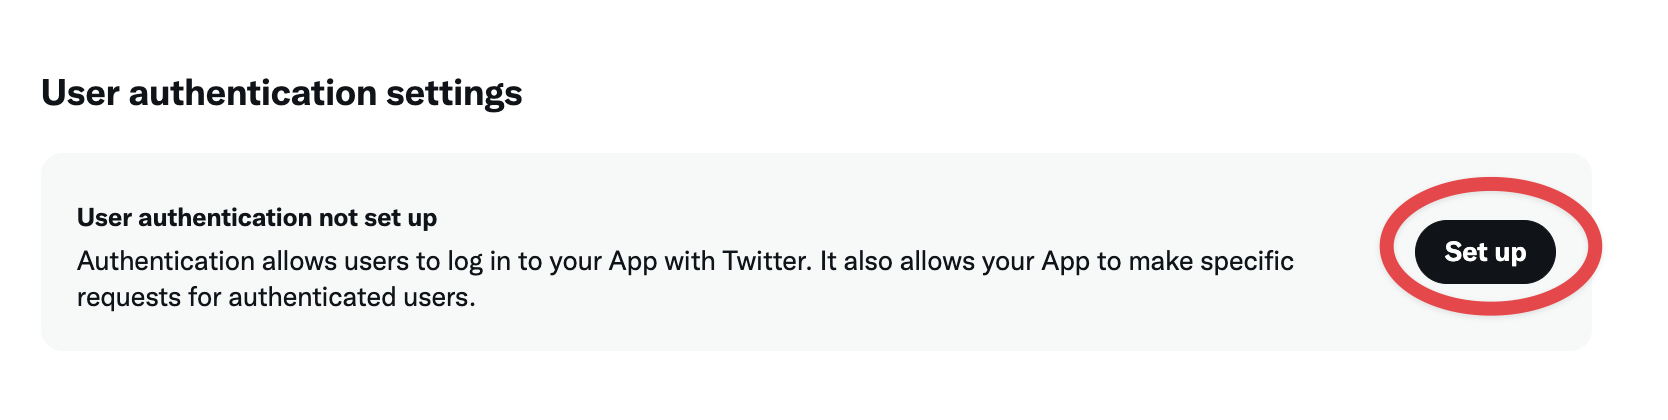
 Click to set up an authentication flow
 * In the App Permission set it to `Read and Write`
* In the Type of App set it to `Native App`
* In the App Info set the `Callback URI / Redirect URL`
You must select `Native App` for OAuth 1.0a to work correctly. Selecting `Web App, Automated App or Bot` will cause authentication to fail with error code 32.
**Your X OAuth2 Redirect URI:**
* Production: `https://your-postiz-domain.com/integrations/social/x`
* Local development: `http://localhost:4200/integrations/social/x`
* Docker: `http://localhost:5000/integrations/social/x`
* If X requires HTTPS for localhost: `https://redirectmeto.com/http://localhost:4200/integrations/social/x`
Save it and go to "Keys and Tokens" tab.
Click on "Regenerate" inside "Consumer Keys" and copy the `API Key` and `API Key Secret`.
Open .env file and add the following:
```env theme={null}
X_API_KEY=""
X_API_SECRET=""
```
## Optional environment variables
* `X_URL` — override the X API base URL (e.g. for self-hosted X-compatible APIs).
* `DISABLE_X_ANALYTICS=true` — skip the analytics fetch on the X channel page. Useful if your X plan doesn't include analytics access and the failed call is noisy.
* `STRIP_LINKS_FROM_X_POSTS=true` — automatically remove URLs from post text before publishing. Some accounts see better reach with no links; this enforces it globally.
## Post Settings
When creating a post for X, you can configure the following options:
* **Who can reply** — Control who can reply to your post: everyone, accounts you follow, mentioned accounts, subscribers, or verified accounts.
* **Post to a community** — Optionally share your post to an X community by providing the community URL.
* **Made with AI** — Mark your post as containing AI-generated content. When enabled, the post will be labeled accordingly on X.
* **Paid partnership** — Mark your post as a paid promotion. When enabled, the post will be labeled as a paid partnership on X.
* In the App Permission set it to `Read and Write`
* In the Type of App set it to `Native App`
* In the App Info set the `Callback URI / Redirect URL`
You must select `Native App` for OAuth 1.0a to work correctly. Selecting `Web App, Automated App or Bot` will cause authentication to fail with error code 32.
**Your X OAuth2 Redirect URI:**
* Production: `https://your-postiz-domain.com/integrations/social/x`
* Local development: `http://localhost:4200/integrations/social/x`
* Docker: `http://localhost:5000/integrations/social/x`
* If X requires HTTPS for localhost: `https://redirectmeto.com/http://localhost:4200/integrations/social/x`
Save it and go to "Keys and Tokens" tab.
Click on "Regenerate" inside "Consumer Keys" and copy the `API Key` and `API Key Secret`.
Open .env file and add the following:
```env theme={null}
X_API_KEY=""
X_API_SECRET=""
```
## Optional environment variables
* `X_URL` — override the X API base URL (e.g. for self-hosted X-compatible APIs).
* `DISABLE_X_ANALYTICS=true` — skip the analytics fetch on the X channel page. Useful if your X plan doesn't include analytics access and the failed call is noisy.
* `STRIP_LINKS_FROM_X_POSTS=true` — automatically remove URLs from post text before publishing. Some accounts see better reach with no links; this enforces it globally.
## Post Settings
When creating a post for X, you can configure the following options:
* **Who can reply** — Control who can reply to your post: everyone, accounts you follow, mentioned accounts, subscribers, or verified accounts.
* **Post to a community** — Optionally share your post to an X community by providing the community URL.
* **Made with AI** — Mark your post as containing AI-generated content. When enabled, the post will be labeled accordingly on X.
* **Paid partnership** — Mark your post as a paid promotion. When enabled, the post will be labeled as a paid partnership on X.